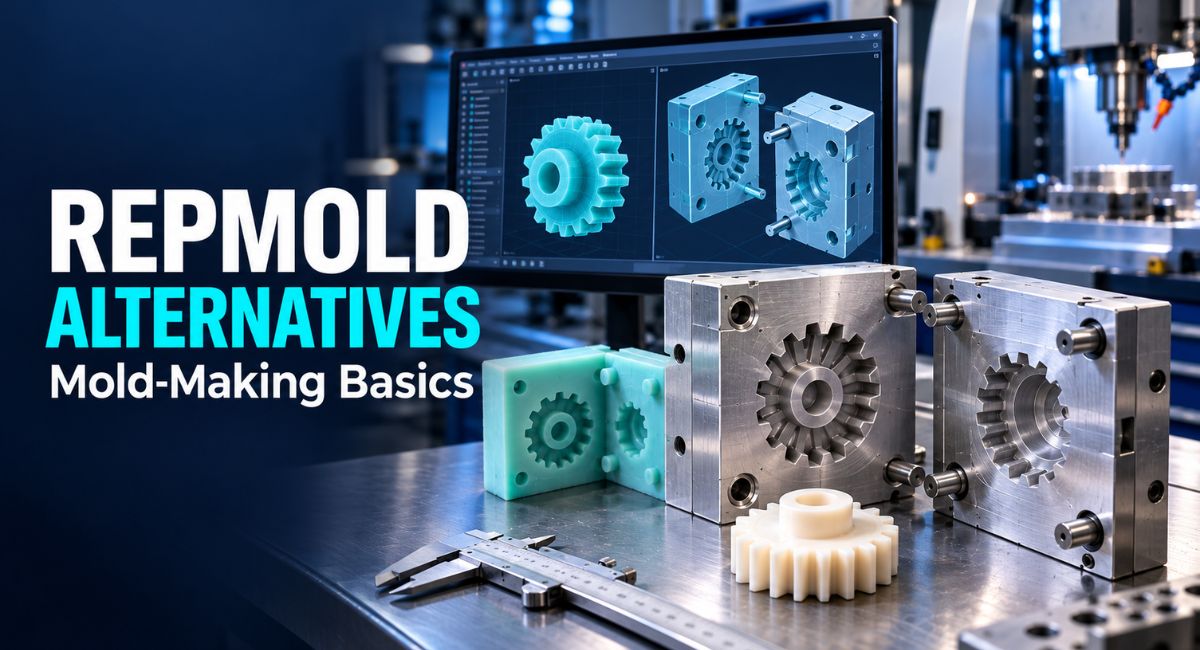
A search for Repmold can leave you with a practical question: which method will actually help you make your part? The answer starts with understanding what you need to produce. A decorative resin piece, a working plastic cover, and a metal bracket may need very different tools. Learning a few common manufacturing terms makes these choices easier. This guide explains useful options, shows where each one fits, and helps you discuss a project with a supplier without getting lost in technical language.
What Does Repmold Mean in This Guide?
The manufacturing references checked for this article did not provide a clear, shared technical definition for Repmold. A name alone also does not tell you which machine, material, or production method a seller offers. Before comparing services, ask for a plain description of the work. Find out whether the supplier will copy an object, build a mold, repair tooling, or make finished parts.
Here, alternatives means established ways to meet those practical needs. Silicone molding, urethane casting, CNC machining, direct 3D printing, and injection molding are options worth understanding. They serve different purposes, so there is no single replacement that suits every project. Comparing their actual steps gives you a useful starting point for choosing a method.
Start With the Part You Need to Make
Before choosing equipment, describe the finished item in simple words. Write down its size, intended use, material needs, and expected quantity. Explain whether appearance, strength, flexibility, or an exact fit matters most. A cover displayed on a shelf has different needs from a cover that must protect a working machine. These details help a supplier understand what a successful result should look like.
Also explain what you already have. You may have a drawing, a computer model, a damaged sample, or only an idea. If you have a worn object, mark which areas should be copied and which need correction. Include photographs with measurements where possible. A clear project brief helps prevent a supplier from quoting for work that does not solve your problem.
Learn the Difference Between a Mold, a Master, and a Casting
A mold contains the shape that a material fills to form a part. A master pattern is the original model used to create that shape. Casting involves placing a suitable material into a mold and allowing it to become solid. Think of a decorative resin badge. The master carries the design, the mold captures it, and the cast badge is the finished copy.
These words matter when you request prices. Making a master, making a mold, and producing copies are separate jobs that may appear in the same quote. Ask whether the price includes all three. Also check the condition of the master before approving the mold. A scratch or unwanted texture on its surface may appear in the copies, creating extra finishing work later.
Understand Rapid Prototyping and Rapid Tooling
Rapid prototyping means making a sample quickly so you can study or test a design. Rapid tooling means making the tools used to produce parts, such as molds or patterns, within a short development cycle. The difference is useful when researching Repmold alternatives. One service may deliver a sample object, while another delivers a tool that can produce several objects.
Imagine designing a small control knob. An early prototype could help you check its size and grip. After changing the design, you might need tooling to produce a test batch in your chosen material. Ask what the supplier will deliver at each stage. A prototype, a mold, and a batch of usable parts should each have a clear purpose and approval step.
Consider Silicone Molds for Detailed Small Batches
Silicone molds can be useful for copying detailed objects in suitable materials, including certain casting resins, waxes, and plaster. Their flexibility can help with removing finished pieces. A simple open mold may suit an object with a flat back. A shape that needs detail on several sides may require a split mold. The right design depends on how the original and its copies will come out.
For someone exploring Repmold alternatives for decorative work, this is one practical option to discuss. A small badge maker, for instance, could ask about a silicone mold for repeated resin copies. However, check compatibility between the master, silicone, and casting material. Certain surfaces can prevent some silicones from curing properly. Follow the material instructions and test a small area before committing the whole project.
Explore Urethane Casting for Product Samples
Urethane casting uses a silicone mold to make polyurethane parts. The process starts with a master pattern, which can be produced using 3D printing. The silicone forms around the master, creating the space used for casting copies. Different polyurethane formulas can produce rigid, flexible, or rubberlike parts. This gives product teams several options for appearance samples and smaller orders.
Suppose a designer needs several matching cases for a product presentation. Cast copies may be worth comparing with individually printed cases. Ask about surface finish, color, dimensions, and the material’s actual properties. A description such as “ABS-like” does not mean the material is ABS. If the samples will face heat, repeated bending, or impact, request the relevant material information before deciding whether they suit the test.
Compare CNC Machining for Tools and Finished Parts
CNC stands for computer numerical control. In machining, computer-controlled cutting tools remove material from a solid piece to create the required shape. This is called subtractive manufacturing. It can produce finished metal or plastic parts directly. Machining is also used to make tooling, including metal molds. Ask whether a quote covers the final component or the tool needed to produce it.
A small metal bracket provides a useful example. If the finished bracket can be machined directly, making a mold may add an unnecessary stage. For a molding project, however, a machined tool could be part of the production plan. Discuss the material, important measurements, and access for cutting tools. Deep spaces and difficult internal shapes may affect what the machinist can produce and how much work is involved.
Use 3D Printing When Designs May Change
Direct 3D printing builds a part from a digital model, usually layer by layer. It can help when you want to study a shape, check how parts fit together, or revise a design. It can also produce usable finished parts when the process and material meet the job’s needs. For Repmold searches focused on early product ideas, understanding this option can help clarify whether you need a mold yet.
You should also distinguish a printed part from a printed mold or master. All three are possible, but their jobs differ. A printed master may be used to create a silicone mold. A printed mold needs material properties suited to the conditions it will face. Ask about surface marks, finishing, heat limits, and expected use. A good-looking display sample does not automatically prove that a design will perform well in service.
Look at Injection Molding for Repeat Production
Plastic injection molding fills a closed mold with molten plastic. The material cools, the mold opens, and the part is removed. The cycle then repeats. This method can be useful when you need consistent parts in repeated production. The mold requires an initial investment, so both the design and the expected order quantity matter when comparing costs.
Do not judge Repmold alternatives by a fixed rule about how many parts make molding worthwhile. Shape, material, tooling choices, and supplier capabilities all affect the result. Ask for prices at the quantities you realistically expect to order. Also discuss likely design changes. Approving an expensive mold before testing important features can lead to later modification costs. A sample approval stage helps you check the result before a larger order.
Know Draft, Undercuts, and Parting Lines
Draft is a slight slope added to suitable faces of a molded part to help it leave the mold. Without enough draft, removal can cause scraping or damage. An undercut is a feature that can trap a part during removal. A hook or side opening may create this problem in a simple mold. Such features may need design changes or extra moving sections in the tooling.
The parting line is where sections of the mold separate. It can leave a visible line on the finished object, so its position may matter for appearance and fit. Ask a supplier to show the proposed opening direction and parting line on your drawing. This discussion is especially useful for visible covers, handles, and decorative products. Solving removal problems during design is easier than discovering them after the tool is made.
Understand Tolerance, Shrinkage, and Surface Finish
Tolerance describes the allowed difference from a stated measurement. If a dimension is 20 millimeters with a tolerance of plus or minus 0.2 millimeters, its allowed range is 19.8 to 20.2 millimeters. Shrinkage is another concern in molding because material can change size as it cools or cures. The tool design and production plan must account for the selected material’s behavior.
Surface finish describes how a surface looks and feels. It might be smooth, textured, polished, or marked by the production process. Explain which surfaces matter most instead of asking for every area to receive the same treatment. A visible front face may need careful finishing, while a hidden inside surface may have simpler needs. Use a drawing or marked photograph to make these differences clear before comparing quotes.
Check Pot Life, Cure Time, and Mold Life
Pot life is the working time available after mixing a material, under the conditions stated by its manufacturer. Cure time tells you how long it takes to reach a stated stage of setting or hardening. These times vary between products. Temperature can also affect them. A material with a short working time may be difficult to use if mixing and filling your mold take longer than expected.
Mold life is a separate issue. It concerns how long the tool remains useful, which depends on its material, the casting material, the design, and how it is handled. Ask a supplier how many acceptable copies they expect from your specific job. Keep notes during a trial run about filling time, removal, surface quality, and damage. Those observations provide better planning information than a general promise that a mold will last.
Compare Repmold Alternatives by Total Project Cost
Compare the cost of receiving usable parts, including design work, patterns, molds, materials, finishing, and inspection. Here is a hypothetical example. A supplier charges $150 for a mold and $6 for each cast part. An order of 20 parts would cost $270 before other charges, or $13.50 each. Direct printing at $20 per part would cost $400 for the same quantity.
At five parts, those sample prices give a different result. Casting would cost $180, while printing would cost $100. These figures are invented to explain the calculation, so they are not market prices. Delivery, finishing, rejected parts, and differences in quality could change the comparison. Use real quotes for your project, and make sure both suppliers are pricing parts that meet the same requirements.
Ask Clear Questions Before Choosing a Supplier
When a supplier uses the Repmold name, ask them to describe their actual method and deliverables. Request the proposed material, important dimensions, finish, and sample approval process in writing. Ask how changes will be handled if the first sample does not fit. A useful answer should connect the production plan with your drawing and explain what will be checked before the full order proceeds.
Also confirm who owns the master, mold, and design files. Ask whether you can receive them, how long the supplier will store tooling, and what a repeat order involves. Keep the approved drawing, sample details, and quote together. This gives both sides a shared reference if questions arise later. Clear records are particularly helpful when you return for another batch after several months.
Conclusion
Choosing between Repmold alternatives becomes easier when you name the actual job and understand the tools involved. Silicone molds, urethane casting, CNC machining, 3D printing, and injection molding each offer useful paths for suitable projects. Start with the part’s purpose, material, quantity, and required quality. Then compare clear quotes and approve a sample before making a larger commitment. Learning the basic terms helps you ask better questions and choose a production plan that fits your needs.
(FAQ’s)
1. Is Repmold a Clearly Defined Manufacturing Process?
The sources checked did not confirm one clear definition, so ask the supplier which process they offer.
2. Which Method Is Worth Checking for a Few Copies?
Direct 3D printing or silicone molding may suit small orders, depending on the material, shape, and finish.
3. Are Urethane Casting and Injection Molding the Same?
No, urethane casting uses liquid polyurethane, while plastic injection molding uses molten plastic.
4. Can a 3D Printer Help With Mold Making?
Yes, a 3D printer can make master patterns and certain molds using materials suited to the process.
5. What Should I Send With a Quote Request?
Send your drawing or model, key dimensions, quantity, material needs, and intended use.
You may also read: What Is Chromtex? A Simple Guide to Green Pigments for Beginners
Visit for more additional information: Loom Magazine